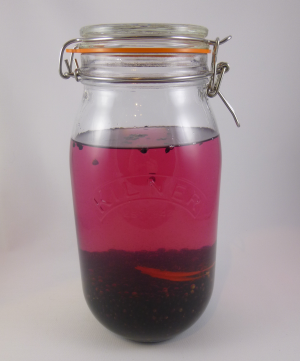
Elderberry liqueur is a great way to use up those hundreds of elderberries that are ripe and ready in September and October. And it’s so simple to make as well.
Elderberries are usually ready in mid to late September in the UK, or perhaps early October depending on your region. You will know they are ready once the berries turn from small and green to fuller plump purple or black. Just watch out because your time window for picking them will be quite short – the birds are going to see when the elderberries are ready and start picking the trees clean!
 Elderberry liqueur infuses the colour and flavour of fresh elderberries over a few short months. If you start now it will be ready just in time for Christmas.
When picking your elderberries leave some for the birds. Saying that, you probably won’t be able to reach the berries that are at the very top of the trees anyway! But leaving some for the birds ensures everyone gets to enjoy the goodness from your elderberry crop.
The recipe for Elderberry Liqueur is simple (elderberries, lemon rind and vodka) and the quantities are flexible.
The longer you leave the elderberries in the vodka, the darker the colour will become and the deeper the flavour. That being said, a handful of berries will only make so much elderberry liqueur so there are some limits!
 Your elderberry liqueur recipe will be determined by how many elderberries you can be bothered to pick and prepare. When I pick elderberries I usually use a pair of secateurs to clip off bunches of elderberries into a bucket.
When I get back to the house I will strip the berries from the stalks, a slow but rewarding job. Prepare to get red fingered from stripping all those elderberries.
It is important to remove as much of the stalks as humanly possible as they can be slightly toxic, and no-one wants to make anyone ill unintentionally.
A pint of elderberries will usually make up to a litre and a half of elderberry liqueur so it’s a good idea to use a 2 litre or quart sized Kilner jar or something similar.
So my recipe would be:
- a pint of elderberries
- 1.5L of decent vodka
- 3 or 4 strips of lemon rind
- sugar (but that will be added later)
And that’s it! Make sure to cut fairly shallow into the lemon and only take the rind, not the white pith underneath as it is quite bitter. A vegetable peeler does a good job.
 Put your pint of elderberries in the Kilner jar, add the lemon slices and pour in your vodka. Close the Kilner jar to seal it.
Stand back and take a picture of your lovely Elderberry Liqueur and show all your friends how creative you’ve been 🙂
Store the elderberry liqueur in a cool cupboard for around 3 months, giving it a bit of a swirl every now and then. It will start out a light pink colour but you’ll find that over time it takes on a deeper colour and more flavour. People tend to describe the final colour as a tawny port. But you can leave it even longer and it will go darker still. But 3 months will give you time, the week before Christmas, to complete the next step.
Now it’s time to strain your elderberry liqueur and remove the berries, leaving just the good stuff for drinking. Having a second Kilner jar and a wide funnel at this point will make the process simpler.
Put the sugar into your clean Kilner jar (around 200g) and strain the elderberry liqueur over the top of the sugar through a funnel and a cheese cloth or muslin to catch all the old berries.
Close the Kilner jar leave it out on your kitchen bench. This is to remind you to swoosh it around every day or so to help the sugar dissolve.
When the sugar has dissolved, taste your elderberry liqueur.
If it needs more sugar, now’s the time to add it and leave for another couple of days to dissolve.
And, Enjoy!
[randomtext category=”Post Footer”]
